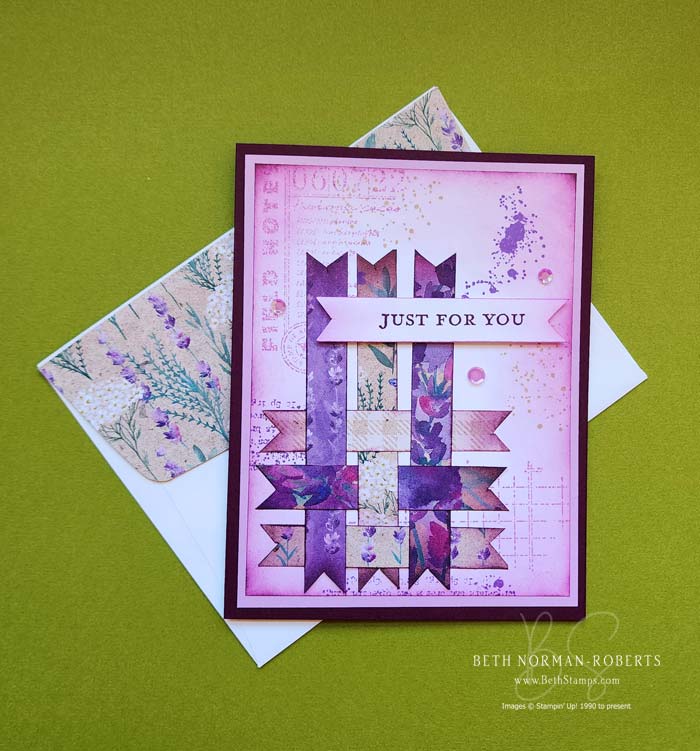
Simply Zinnia is one of my favourite stamp sets and I am sorry to see them on the Last Chancel list. You may recall the Simply Zinnia stamps that I coloured. This stamp set is truly one to have if you love to colour. Below I used a coordinating designer series paper.

Hello Friends,
Good morning! How has your week been.? Keeping warm I hope. My city is in a deep freeze, and I know so many of you are too. Stay safe everyone.
This is the first card that I ever made using Designer Series Paper as the focal point and I love it. Not only does it capture the beauty of the DSP, it makes for a very quick card.
Tutorial
- Cut an 8 1/2″ x 5 1/2″ piece of white cardstock and score at 4 1/4″ (A2 size)
- Cut a white piece of cardstock at 4″ x 5 1/4″
- Place the piece that you just cut for the card front into an embossing folder and run it through the Cut & Emboss machine
- Adhere the embossed piece of cardstock to the mat
- Cut DSP at 3 1/4″ x 3 1/4″
- Cut the mat for the square piece of DSP at 3 1/2″ x 3 1/2″
- Glue the DSP onto the mat
- Glue the 3 1/4″ x 3 1/4″ piece of designer series paper onto the mat
- Cut a piece of ribbon and tie it around the designer series paper
- Adhere the matted piece to the card front with dimensionals
- Heat emboss a sentiment onto 2 3/4″ x 3/4″ piece of cardstock
- Adhere to card front.
As always, enjoy your paper crafting and please share your projects with me. I enjoy seeing what other creative minds come up with and am frequently inspired by them.
Happy Stampin’, Beth
Product List
")
 Designer Series Paper")

")
 Metallic Woven Ribbon")


")


that is some gorgeous paper and makes a great focal!